Installing a gun safe light kit allows you to easily see your valuables, so you’re not fumbling in the dark.
In this post we’ll cover:
- Safety Precautions for Gun Safe LED Lights
- How to Install Lights in a Gun Safe
- Top 3 Reasons Gun Safe Lighting is Important
- Gun Safe Lighting FAQ
The post specifically covers installing our NW Safe LED Light Kit. Unlike some kits that don’t provide full coverage, this kit is specifically designed to illuminate the entire interior of your safe.
Safety Precautions for Gun Safe LED Lights
Before assembling your lighting fixture, we strongly recommend you read the user manual and heed all warnings.
The following are the safety precautions that apply specifically to our gun safe LED light kit:
- This is a non-waterproof light. Do not use it close to any source of water.
- Do not use this light close to any heat source.
- Place the device out of reach of children.
How to Install Lights in a Gun Safe with NW Safe’s LED Light Kit (9 Steps)
The NW Safe LED Light Kit includes:
- 6 Light Wands
- 1 Motion Sensor
- 5 Extensions
- 1 Power Cable & Outlet Plug
- Philips Head Screws
1. Get Situated
Remove all components from the box and ensure all are accounted for.
2. Assemble Initial Wands
Start with the light wands. Connect four of the wands together. (One of the wands will be mounted at the top of the safe, perpendicular to the door. Three of the wands will be mounted running down the side of the safe, parallel to the door and close to the opening.)
Remove the 3M sticky tape from each wand. (This will hold it in place during the mounting process. To ensure they don’t move, screws will be added.)
3. Identify the Correct End of the Light Wand to Install at the Top of the Safe
Don’t install the lights just yet! Find the motion sensor. It should have a male end, indicating the female end of the wands should be at the bottom of the safe.
4. Stick Your 4 Wand Light String in Place
Using the sticky side of the light wand, attach the top wand to the top of the safe along the left-hand seem, perpendicular to the door. (This is the male end of the string of wand lights.)
Attach the following three wands to the side of the safe, running from the top, down the side. (The female plug should be at the bottom.)
5. Assemble Final 2 Wands
Connect the remaining two light wands. (If you would like them spaced further apart, use one of the included extension cables. These allow you to place the lights further away, dispersing the light over a greater area. This is a good option if you have a taller space and can be utilized with the initial four light wands as well.)
Remove the 3M sticky tape from each wand. Stick the lights to the right-hand side of the safe, parallel to the door opening. (If there is a small amount of excess wire, this is normal. It can often be tucked between the sheetrock to reduce its visibility.)
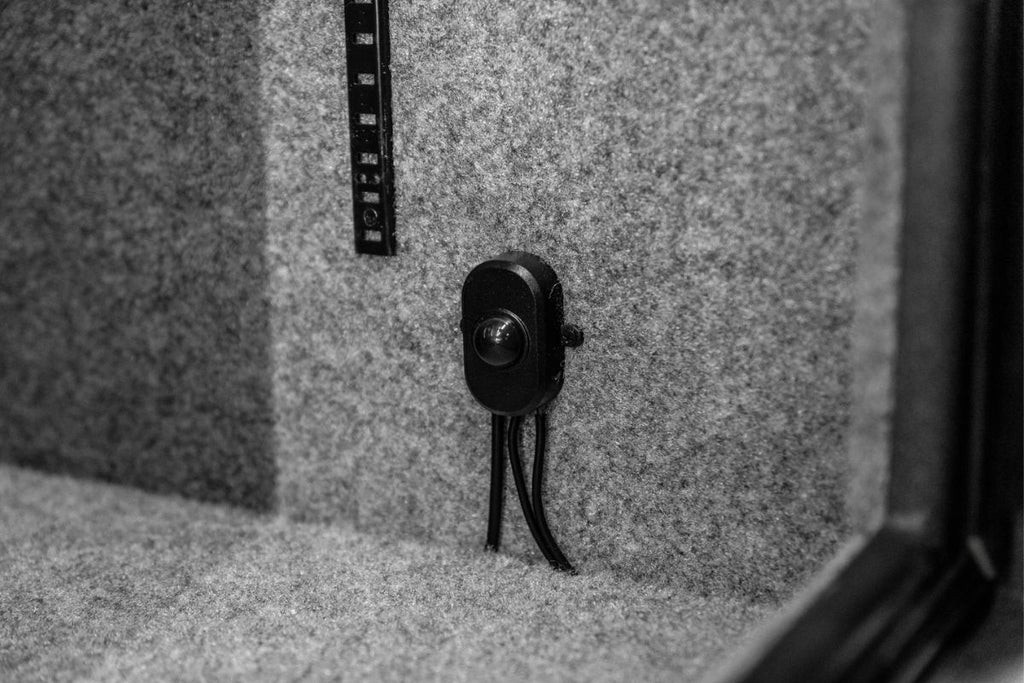
6. Install Motion Sensor
There are three cables coming out of your motion sensor: Power, Short Lead (attaches to near side), Long Lead (attaches to far side). Place the round piece of 3M stick tape to the back of the motion sensor. Remove the covered side of the tape.
Install the motion sensor to the bottom right-hand side of the safe, in line with the shelf. This keeps it as close to the door as possible while giving it a safe distance so it won’t be crushed when the door closes.
Attach the long lead to the lights on the left. Attach the short lead to the lights on the right.

7. Make Power Accessible
Remove the lowest safe on your shelf. Using an electric drill, drill through the pre-drilled hole on the back of your safe, creating a small hole in the fireboard.
Run the cord for the power cable through the hole you just created, leaving the plug on the outside of the safe so it can be plugged into the wall. Plug in the motion sensor. Plug in the power. And with a little bit of motion, your lights will turn on.
NOTE 1: This how-to is specific to Liberty’s Centurion and USA lines which have a pre-drilled holes. If you have a different safe, especially one made by a different manufacturer, the approach may be different. If you have questions about how to install your light kit in a different model, please contact us.
NOTE 2: Be VERY careful. The interior fabric on the Liberty Centurion 24 shown here is glued to the sheetrock, this allows you to drill through it without ripping the fabric. This is not the case with all safes. If the fabric is not glued or is only partially glued, it can be much more difficult to drill through the fabric without ripping it.
8. Tidy Up Your Wires
Tuck the exposed wires into the free spaces within the sheetrock. (A small 90-degree pry tool can make this easier.)
9. Screw the Lights in Place
There are small screw holes on either side of each light wand. Use the included Philips head screws to screw the lights into place. (We’ve found a No. 1 on an impact works well.)
Top 3 Reasons Gun Safe Lighting is Important
1. Visibility
By nature, a safe is a dark and cavernous space, which can make it difficult to see the contents inside. Installing an LED light kit allows you to eliminate shadows and improve the visibility within your safe.
2. Organization
Make no mistake about it, when it’s hard to see inside of a space, it’s hard to organize it. Because you want to take advantage of every square inch within your safe, organization is paramount. Lights allow you to do that.
3. Quicker Access
Fumbling around in a dark safe is a lot like changing a tire in the dark. It’s difficult and it can be downright dangerous — especially if you’re trying to move quickly. Lights allow you to see what you’re doing, so you can quickly access the firearms and valuables you need.

Gun Safe Lighting FAQ
How Many Lumens of Light Does the NW Safe LED Light Kit Provide?
Each wand in the NW Safe LED light kit produces 150 lumens (LM). In total, a six wand light kit provides 900LM.
Why Not Use a Battery-Operated Light?
s with anything battery-operated, the batteries only last so long. And, they rarely run out of juice at a convenient time. Our LED light kits plug into the wall, ensuring they have a consistent power source.
How Long Will the LED Bulbs Last?
In addition to being extremely energy efficient, LED lights are recognized for their long lifespan. Our LED light kit has a lifespan of 30,000 hours, giving the average user* 625 years' worth of light.
Does Installing an LED Light Kit in a Gun Safe Require Special Wiring and Electrical Knowledge?
No. Installing a NW Safe LED Light Kit in your gun safe does not require special wiring and electrical knowledge. That being said, the light kits work best when the lights are properly installed in the optimal location.
*We guestimate that the average user has their gun safe open for 4 hours a month.